Section 4: LibSass & Node.js
Overview
In this section, we're going to step away from our focus on Sass syntax and look at how we can use Sass outside the context of our own command line. We're going to do this by looking at a LibSass wrapper known as Node-sass. As you might have already guessed, Node-sass is a wrapper that acts as middleware between a Node server and the LibSass library. It is highly suggested to follow along with this, typing in each chunk of code as we go. For that reason, you should ensure that you've completed the Setup process and that you can access LibSass via SassC on the command line.
On this page, we'll be covering the following:
- Part 1: Getting a basic Node server up and running.
- Part 2: Using Node-sass to compile .scss files.
- Part 3: Displaying our results in the browser.
Once you've finished this section, you'll have created a working app that compiles SCSS to CSS on the server, and then sends that to the browser. You should have a better understanding of the potential that LibSass and its various wrappers offer, and you should be ready to jump into using them in your own projects.
Part 1: Running a Node.js web server
Setup & Installations
In order to get things going, we need to first set up our package.json file and then install a few things. We'll use one of NPM's built in tools to take care of the package.json file and them, we'll move on to the installs. To begin, open up your terminal and type in the following (pay attention to the prompts and what I enter as I go along):
$ npm init
This utility will walk you through creating a package.json file.
It only covers the most common items, and tries to guess sane defaults.

See `npm help json` for definitive documentation on these fields
and exactly what they do.

Use `npm install  --save` afterwards to install a package and
save it as a dependency in the package.json file.

Press ^C at any time to quit.
name: (directory-name) [press enter here]
version: (1.0.0) [press enter here]
description: [type a description or press enter here]
entry point: (index.js) app.js
test command: [press enter here]
git repository: [press enter here]
keywords: [press enter here]
author: [Type your name]
license: (ISC) [press enter here]

{
  "name": "directory-name",
  "version": "1.0.0",
  "description": "",
  "main": "app.js",
  "scripts": {
      "test": "echo \"Error: no test specified\" && exit 1"
  },
  "author": "Your Name",
  "liscense": "ISC"
}


Is this ok? (yes) [press enter here]
Now that you've got your package.json built, you need to install express.js and Node-sass as dependencies of the app. Express is a lightweight Node framework that will make setting things up a LOT easier, so lets install that first:
npm install --save expressAfter running that command, you should have a node_modules file created in your current directory and should also be able to see a new dependency for express in your package.json file. Installing node-sass is almost as easy. If your on a Max / Linux system, you should be able to run:
npm install --save node-sassIf you're in windows, Node-sass requires Visual Studio 2013 WD. Because you already installed SassC using Visual Studio, you should be all good here, but if you have multiple versions installed, the alternate command you should use to install Node-sass on Windows is:
npm install --save --msvs_version=2013 node-sassAs long as all of those installs went well, you can move on to building out your server.
Building our basic server code
To begin building our basic server code, you'll need to create a file with your favorite text editor called app.js
in the root of your project dirctory (where you ran npm init). The file
should contain the following code:
var express = require('express');
var app = express();

app.get('/', function(req, res) {
    res.send('Hello World!');
});

app.listen(8080, function() {
    console.log('Node-sass app listening on port 8080!; Press Ctrl-C to terminate.')
});
Lets quickly walk through our code. Lines 1 and 2 are importing the express module and creating the app variable. Lines 4-6 setup the default route (When GET requests are made without any extra info) to return the text "Hello World!". And lines 8-10 set the app to listen for GET requests on port 8080.
Running our server
Go back to your terminal, make sure your in the same directory where your app.js file is, and type the following in:
$ node app.jsIf there's no problem you should see the following in your terminal:
Node-sass app listening on port 8080!; Press Ctrl-C to terminate.Now open your browser and navigate to localhost:8080 and you shold see a blank page with the text "Hello World!"
Part 2: Server-side Sass compilation
Modifying our server-side code
Now that you've got your server code up and running, we want to start compiling Sass. To do that, we're going to have to make some changes to our server side code. Go back to your app.js and update it so it matches what you see here (additions are highlighted to make it easier to pick out):
// app.jsvar express = require('express');
var sass = require('node-sass');
var fs = require('fs');
var app = express();
app.get('/', function(req, res) {
// set options for compiling .scss file
var in_file = __dirname + '/test.scss';
var out_file = __dirname + '/test.css';
// compile the .scss file using sass's render method
sass.render({
file: in_file,
outFile: out_file,
}, function(error, result) {
if (!error) {
fs.writeFile(out_file, result.css, function(err) {
if (!err) {
console.log("Sass compiled and written to file.");
} else {
console.log("File compiled, but could not write to disc. ");
}
});
} else {
console.log('There was a problem with compilation.');
}
});
res.send('Hello World!');
});
app.listen(8080, function() {
console.log('Node-sass app listening on port 8080!; Press Ctrl-C to terminate.')
});
As you should be able to see, there are three new additions. The first occurs on lines 2 and 3, where we not require
node-sass and fs, which is a build in node module for accessing the server's file system. The second addition occurs on
lines 9 and 10. Each of these variable definitions is creating a string which represents the absolute path to the file
we'll be reading from (in_file) and the file we'll be writing to (out_file). The
__dirname expression is built into node and returns the directory of the .js file it is called in.
Finally, lines 13-28 represent the meat of this section. On line 13 we call the render function and then on lines 14-15 we
pass it a javascript object containing options that the render function uses. The two options that we are passing in for
this function call are file (the .scss file we'll be reading from), and outFile (the file we want
to write to). On line 16, we then pass in a callback function which takes an error object and a result object. If there was
not an error (line 17), we then call the writeFile method of the fs object we created earlier, passing it the file
to write to, the css attribute of the result object, and another callback function. It is at this point that the file should
be written to your file system. The lines inside this callback simply report wether or not that was done successfully.
Writing some Sass
To test our new server code, we need to create a .scss file that it can compile, and as the code above indicates, that file should be called test.scss. You should create a new file called "test.scss" in the same directory as your app.js file and in that file, use the following code:
// test.scss$some-variable: red;
.random-class-name {
background-color: $some-variable;
}Verifying Sass compilation
Now that you've got your server updated and a .scss file written, lets test our code. Head to your terminal, make sure you're in the same directory as app.js, and run the following. Your output should match what you see here:
node app.js
Node-sass app listening on port 8080!; Press Ctrl-C to terminate.
Now head to your browser and open localhost:8080. You should still see the "Hello World!" message but in addition to that, when you return to your terminal, you should see the following output:
Sass compiled and written to file.If you get any other messages, either that compilation failed or that writing the file failed, go back and check that your code matches what is above. Also, run the following in your terminal to ensure that you've actually got LibSass and SassC on your system's PATH:
$ sassc -vIf that doesn't work for you, head back to the Setup page and ensure that you followed the directions there properly.
You should also check the folder where your .scss file was originally and ensure that a new CSS file named test.css was created. If it's there, open it in your text editor and verify it's contents look like this:
// test.css.random-class-name {
background-color: red; }If that's what you see, then congratulations, you've successfully written a server based app that uses the Node-sass LibSass wrapper! While that's cool and all, we still want to display the results of our work in the browser, so lets move on to the next part.
Part 3: Displaying our results in the browser
More server-side modification
In the final part of this section, we'll take a look at how to display what we've done in the browser. While it's nice that we can compile using the Node-sass wrapper, that doesn't do anything that we couldn't already do with the default command line tool. In order to complete this last section, we're going to have to make a few more modifications to the server side code:
// app.jsvar express = require('express');
var sass = require('node-sass');
var fs = require('fs');
var app = express();
app.get('/', function(req, res) {
// set options for compiling .scss file
var in_file = __dirname + '/test.scss';
var out_file = __dirname + '/test.css';
// compile the .scss file using sass's render method
sass.render({
file: in_file,
outFile: out_file,
}, function(error, result) {
if (!error) {
fs.writeFile(out_file, result.css, function(err) {
if (!err) {
console.log("Sass compiled and written to file.");
} else {
console.log("File compiled, but could not write to disc.");
}
});
} else {
console.log('There was a problem with compilation.');
}
});
var options = {
root: __dirname + '',
};
res.sendFile('index.html', options);
});
app.get('/test.css', function(req, res) {
var options = {
root: __dirname + '',
};
res.sendFile('test.css', options);
});
app.listen(8080, function() {
console.log('Node-sass app listening on port 8080!; Press Ctrl-C to terminate.')
});
As you should be able to observe, the new additions occur on 30-34 and on lines 37-42. The first set of
additions enables us to start serving html documents instead of just plain text. First, on lines 30-32, I
create an options object containing the path to the root of the current directory. This is necessary
otherwise the sendFile method doesn't know where to look for the file it is sending. Next, on
line 34, I send the index.html file (we haven't created this yet) and pass in the options object along
with the file name.
The next change to the file occurs on 37-43. Because we want to style our web page with a .css file, we have to find a way to send that file from the server to the web page. Normally, if we were using a templatin engine (beyond the scope of this tutorial), we might output the CSS directly into the html document. In this case, we need to create a new GET route to respond to the browsers request for the .css document. That's exactly what we do on line 37. After that, the pattern is exactly the same, except that we send the file test.css instead of index.html.
Creating a basic HTML file and some new Sass
In order to use our server the way that we now have it configured, we need to create the index.html file. Additionaly, we're going to want to modify our test.scss file so that it does something a little moore interesting. You should now open your text editor and create a new file called index.html. Also, re-open test.scss and then ensure that both files match what you find below:
<!DOCTYPE html>
<html lang="en">
    <head>
        <title>Testing Node-Sass & LibSass</title>
        <link rel="stylesheet" href="test.css">
    </head>
    <body>
        <h1 id='underlined-heading'>Testing LibSass & Node-sass</h1>
        <p id='test-sass'>Am I styled?</p>
    </body>
</html>$underline-style: underline;
$background-color: #CF649A;
@mixin sass-styled {
color: #CF649A;
font-size: large;
content: " You're styled!";
}
#underlined-heading {
text-decoration: $underline-style;
background-color: $background-color;
}
#test-sass:after {
@include sass-styled;
}Viewing the finished product
Now that you've got your html written and your Sass spiced up, you can test everything out
by firing up your shiny new server. You'll want to open your terminal and cd
to your project's directory. Once there, type in the commands as they appear below, and
visit localhost:8080 in your browser. Your command line
output should match what you see below:
$ node app.js
Node-sass app listening on port 8080!; Press Ctrl-C to terminate

# now fire up your browser and visit http://localhost:8080 and you shold see this output
Sass compiled and written to file.
If everything worked according to plan, you should see a rendered page that looks something like the following image.
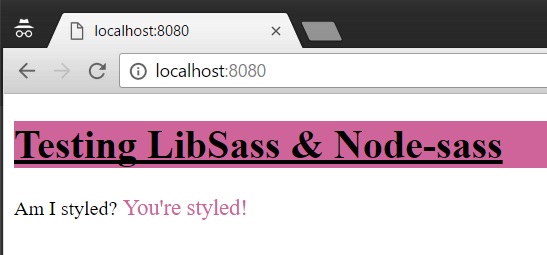
You should also check in the same folder as the test.scss file and ensure that your rendered CSS looks like:
#underlined-heading {
  text-decoration: underline;
  background-color: #CF649A; }

#test-sass:after {
  color: #CF649A;
  font-size: large;
  content: " You're styled!"; }
Wrap Up: You made it!
At this point, you've built a working Node.js app that uses the Node-sass middleware to compile .scss files using the C/C++ LibSass library. You should feel proud of yourself. It's also possible that you're reading this and you haven't had such success. If that's the case, don't worry yourself! Sometimes it takes time to really get this stuff.
If you tried you best and still couldn't get the app working, you can execute the following commands to download a copy of the code featured in this part of the how-to, install the required dependencies, and run the app. If your problems were with bad JavaScript, HTML, or SCSS syntax, this will help root them out. Note: this will not fix any issues related to LibSass or SassC not being accessible on your system PATH.
$ git clone https://github.com/pfohlj/node-sass-demo.git ./node-sass-demo
... a bunch of output ...
$ cd ./node-sass-demo
$ npm install
... a bunch of output ...
$ node app.js
Node-sass app listening on port 8080!; Press Ctrl-C to terminate
At this point, you know more than enough to use Sass effectively in any context. The only place to go from here is to the official documentation for more learning. On the next page you'll find links to further reading and docs.